| Price | Negotiable |
| MOQ | 10 pcs |
| Delivery Time | 1-3 days after full payment |
| Place of Origin | Guangdong, China (Mainland) |
| Certification | CE/ROHS/FCC/SGS |
| Model Number | XAPS6 |
| Packaging Details | Packed Strictly with foam box and bags and boxes with Anti-Static boxes high quality lcd screen |
| Payment Terms | T/T, Western Union, MoneyGram,paypal |
| Supply Ability | 10000pcs per week |
| Place of Origin | Guangdong, China (Mainland) | Screen | 5.1 inches |
| Packaging Details | Packed Strictly with foam box and bags and boxes with Anti-Static boxes high quality lcd screen | Color | white / black / gold other |
| Shipment | UPS, TNT, EMS, DHL, FedEx | Material | IPS |
| Model Number | XAPS6 | Supply Ability | 10000pcs per week |
| Certification | CE/ROHS/FCC/SGS | MOQ | 10pcs |
| Weight | 10 pcs for 1.5kg | Payment Terms | T/T, Western Union, MoneyGram,paypal |
| Payment | T/T, Western Union, Escrow,Paypal | Price | Negotiable |
| Delivery Time | 1-3 days after full payment | Quality | Brand original new / AAA grade |
| Minimum Order Quantity | 10 pcs | Guarantee | 6 months |
| Pixel | 2560x1440 |
Notes:
Please
test
the
functionality
of
this
item
before
installation.
Specifications:
Color:
Sapphire
Screen
Size:
5.1
inches
Resolution:
1440
x
2560
pixels,
577
ppi
pixel
density
Display
Type:
Super
AMOLED
capacitive
touchscreen,
16M
colors
Protective
Material:
Corning
Gorilla
Glass
4
Compatibility:
Galaxy
S6
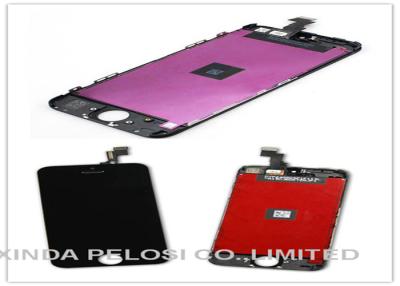
This
item
includes
the
following
components:
1.
LCD
Display;
2.
Digitizer
Touch
Screen.
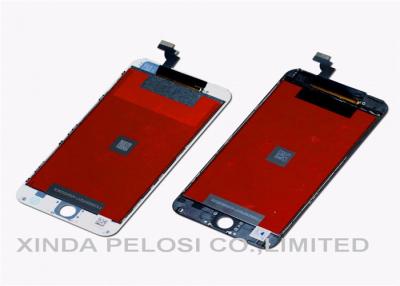
Features:
●
This
Galaxy
S6
Screen
Replacement
includes
the
LCD
Screen,
Digitizer
Touch
Screen
with
Glass
Lens
already
attached.
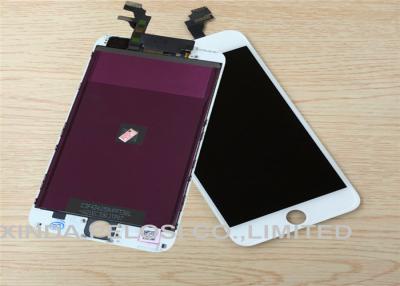
●
This
Galaxy
S6
LCD
and
Digitizer
Assembly
is
a
brand
new
and
original
replacement.
●
The
Galaxy
S6
Replacement
Screen
is
available
in
sapphire
at
present.
●
This
LCD
Touch
Screen
Assembly
is
compatible
with
all
Galaxy
S6
models.
How to Install / Tips:
●
Please
choose
the
right
part
before
placing
an
order.
●
Special
repairing
tools
are
required
for
assembling
or
disassembling,
as
the
Galaxy
S6
LCD
and
Digitizer
Assembly
is
hermetically
attached.
●
Handle
the
vulnerable
and
fragile
flex
cable
ribbon
carefully.
●
Please
try
to
handle
the
repair
or
replacement
work
in
a
dry
and
dust
free
environment
without
direct
sunlight.
●
The
installation
of
any
new
part
should
be
done
by
a
qualified
person.
We
will
not
responsible
for
any
damage
caused
during
installation.
Galaxy
S6
Teardown
Tutorial
Guide:
Step 1: Take Out The SIM Card Tray.
▪ Power off the Galaxy S6.
▪ Use an ejector pin or tweezers to take out the SIM Card Tray.
Step 2: Take Apart The Battery Door.
▪ Heat up the Galaxy S6's Battery Door.
▪ Pull the battery cover up with a screen suction cup tool. (The battery door is stuck to the middle plate with some really strong adhesive, take your time to remove it)
▪ Separate the battery door with a case opening tool.
Step 3: Release The Rear Housing.
▪ Undo the 13 screws in the rear housing.
▪ Heat up the LCD Assembly.
▪ Separate the rear housing from the LCD Assembly with the help of a suction cup tool and case opening tool.
(Notice: be careful not to damage the wireless charging chip attached to the battery.)
Step 4: Remove The Case Buttons.
▪ Remove the power button flex.
▪ Remove the volume button flex.
▪ Remove the Case Buttons. (Notice: the Galaxy S6 power button and volume buttons are compatible with each other.)
Step 5: Release The Wireless Charging Chip.
▪ Pry up the wireless charging coil's flex ribbons on both sides of rear housing. (Notice: be careful not to damage the flex ribbons.)
Step 6: Remove The Motherboard.
▪ Pry up the LCD assembly connector, front facing camera connector, battery connector, ear speaker connector and home button flex ribbon connector.
▪ Turn over the motherboard and pry up the connector.
Step 7: Remove The Battery.
▪ Gently pry up the battery with a spudger tool.
Step 8: Remove Small Components.
▪ Remove the front facing camera.
▪ Remove the ear speaker. (Notice: be careful not to break the flex ribbon.)
▪ Remove the vibrating motor.
▪ Remove the rear facing camera.
Step 9: Release The Charging Port Assembly.
▪ Remove the Bluetooth and Wi-Fi cables.
▪ Undo the earphone jack screw. (Notice: the screw is different than the rear housing screws.)
▪ Heat up the LCD Assembly to release the front housing.
▪ Pry up the navigation light stickers.
Step 10: Release The Home Button With Flex.
▪ Pry up the connector on the back side of home button.
▪ Pry up the home button.
The Galaxy S6 disassembly is now complete.